iDEAL
Integrate iDEAL using our Web SDK.
Ideal is an online payment method that enables consumers to pay through their own bank. To enable IDEAL for your account, please contact customer support to set this up.
Integrating iDEAL
Make sure you are using Web SDK Version 0.0.18 (or higher).
Make sure you have implemented the following prerequisites:
-
From the Web SDK integration guide, you have completed the following:
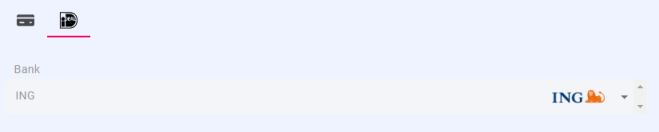
Step One: Add the iDEAL payment tab
The fields referred to in this step are part of the iFrame configuration object supplied in the: createCardDetails() (Step Two in the Prerequisites) call: judo.createCardDetails('payment-iFrame', iFrameConfiguration)
To add the iDEAL payment tab:
-
Ensure the array set for the enabledPaymentMethods field includes ‘IDEAL’.
For example:
enabledPaymentMethods: ['CARD', 'IDEAL']
Transaction Timeout
You can alter the timeout for iDEAL transactions by setting the field idealPollingTimeout.
Set it as the number of ms you want the timeout to be.
For example: idealPollingTimeout: 40000 would set the transaction timeout to 40000ms (40 seconds).
If the field is not provided, the default value is 60000ms
Step Two: Making an iDEAL Transaction
-
Define the idealConfiguration object for the payment.
Ensure the details used when creating the paymentSession match the values set in the following configuration:
To successfully process an iDEAL transaction, the currency must be ‘EUR’ (Euros).
|
Parameter |
Description |
|---|---|
judoId String Required |
Unique ID supplied by Judopay. Specific to a merchant and/or location. Format:
|
amount Decimal Required |
The amount to process. Format:
For currencies using a different structure please contact Judopay for support. |
currency String Required |
The currency of the transaction. The ISO 4217 alphabetic currency code: For iDEAL payments this must be EUR. |
yourConsumerReference String Required |
Unique reference to anonymously identify your customer. Advisable to use GUIDs. Must be below 40 characters. |
yourPaymentReference String Required |
Your unique reference for this payment. Format:
This value should be unique in order to protect your customers against duplicate transactions. With a server side integration, if a payment reference is not supplied, the transaction will not be processed. |
paymentMethod String Required |
The payment method being used.
|
accountHolderName String Required |
The name of the account holder related to this transaction. |
country String Required |
The 2-letter ISO country code from which the consumer will be paying.
|
-
Call getPaymentMethod() in your function that handles the payment button click for card payments.
(If this is not already set up, add a function to handle this).
getPaymentMethod() returns information on which tab is open in the iFrame. Call the appropriate Web SDK method to trigger the correct transaction.
For example:
-
If the card form tab is open, getPaymentMethod will return “CARD”.
-
For a payment, call:
invokePayment() -
For a preAuth, call:
invokePreauth()
-
-
If the iDEAL tab is open, getPaymentMethod will return “IDEAL”.
-
Call:
invokePaymentWithIDEAL()
-
-
If you do not already have an event handler on your payment button to invoke the handlePaymentButtonClick():
-
Add the onclick attribute to your payment button:
<button id="submit-payment-button" onclick="handlePaymentButtonClick()"> Pay Now </button>
-
Make sure you have set :id ="submit-payment-button".
This is required to perform form validation ,where the Pay button will be greyed out until all the information has been entered.
Step Three: Handle the Response
Once the transaction is complete you will receive either:
-
A JSON object response (a Judopay receipt object):
For more information and schema on the JSON object, see API Transaction Response.
-
An error object:
For more information on error responses returned, see Web SDK Error Responses.
The consumer should be redirected to the outcome screen and the response/error should be handled accordingly.
For example, if the result = SUCCESS redirect the consumer to the Success Page, else ERROR.
For more information on the response codes, see Codes.